


Every crack in a concrete slab is a future problem for an epoxy coating. Epoxy bonds to the surface it’s applied over, and it can’t fix structural issues underneath it. If a crack isn’t properly repaired before installation, it will almost always come back through the new floor, usually within the first year or two. Here’s what actually needs to happen before an epoxy coating goes down.
Why Cracks Matter So Much for Epoxy
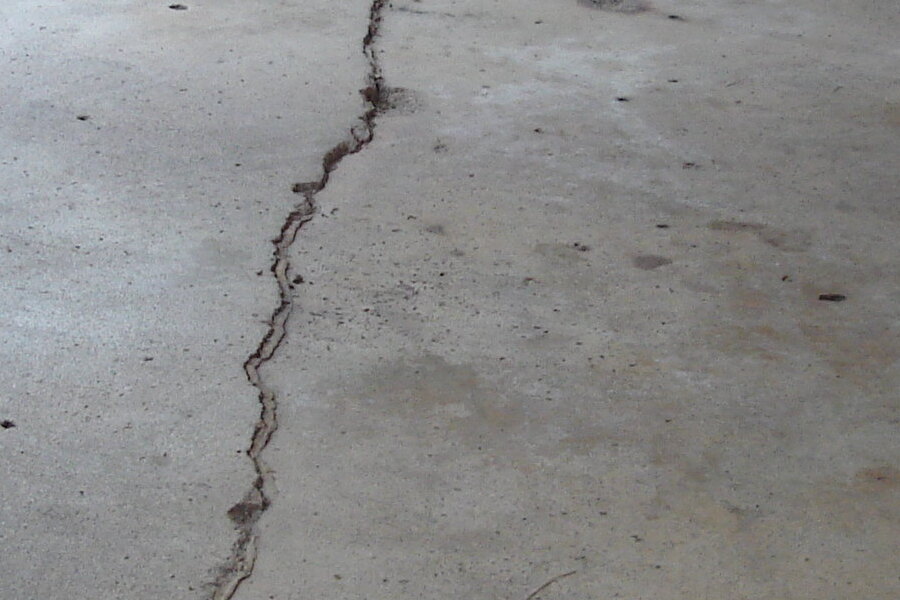
Concrete cracks for a lot of reasons — slab settling, temperature swings, moisture movement, or simple age. Whatever the cause, a crack represents a point where the slab is no longer one continuous, stable surface. Epoxy is rigid once cured. It doesn’t stretch or flex to absorb ongoing movement in the concrete beneath it.
When a crack under an epoxy coating experiences even small amounts of continued movement, the coating above it has nowhere to go. It either cracks along the same line (called “telegraphing”) or delaminates from the slab around the crack, creating a weak spot that widens over time with traffic.
This is why crack repair isn’t a cosmetic step before coating — it’s a structural prerequisite. Skipping it, or patching it poorly, sets the entire installation up to fail early regardless of how good the epoxy product itself is.
Repair Methods, and When Each One Applies
Rout and seal (V-groove repair). For hairline to moderate cracks, the crack is widened slightly with a saw or grinder into a V or U shape, then filled with a semi-rigid or flexible epoxy or polyurethane crack filler. This is the standard approach for cracks with minimal ongoing movement.
Epoxy injection. For structural cracks where the slab pieces need to be bonded back together (not just filled), low-viscosity epoxy is injected under pressure into the crack, filling it fully from the inside out and restoring some structural continuity. This is common on cracks resulting from slab settling that has since stabilized.
Flexible polyurethane fill. For cracks in slabs with ongoing seasonal movement — common in regions with significant freeze-thaw cycling — a flexible polyurethane sealant is used instead of rigid epoxy filler, since it can move with the crack rather than fighting it.
Full-depth patching. For larger cracks accompanied by spalling or crumbling concrete, the damaged material is removed entirely and replaced with a bonding-agent-primed concrete or epoxy mortar patch, rebuilding a sound substrate before any coating work begins.
Routing with joint filler for active control joints. Existing control joints (intentional cuts in a slab designed to manage cracking) aren’t repaired the same way as unplanned cracks — they typically get a semi-rigid joint filler that allows the coating to run across the joint cleanly while still letting the joint function.
When Epoxy Coatings Fail Because of Cracks
Understanding failure patterns helps explain why proper crack repair matters as much as it does:
- Reflective cracking — the original crack pattern reappears in the new coating, usually within months, because the crack wasn’t filled with a product designed to bond and bridge it properly.
- Edge lifting — coating peels away from the edges of a poorly repaired crack because the patch material didn’t bond well to the surrounding slab.
- Bubbling near repair zones — trapped moisture in an improperly cured patch pushes up under the coating once it’s sealed over, creating bubbles that eventually pop or peel.
- Ongoing structural cracks — cracks caused by unresolved foundation or slab settling issues will keep moving and keep reopening no matter what repair method is used until the underlying cause is addressed.
That last one is important. Cosmetic crack repair can’t outrun an active structural problem. If a slab is still settling, that needs to be evaluated separately before any coating investment is made.
The Prep Checklist Before Coating Goes Down
- Assess and categorize every crack. Hairline, moderate, structural, and active control joints all need different treatment — they shouldn’t all get the same generic filler.
- Confirm the slab has stabilized. If cracks are actively widening or new ones are appearing, address the underlying cause before investing in coating.
- Repair using the method matched to the crack type, not just whatever product happens to be on hand.
- Allow full cure time on all repairs before moving to surface prep — rushing this step is one of the most common causes of early coating failure.
- Grind or shot-blast the entire surface, including repaired areas, to create the mechanical profile epoxy needs to bond properly.
- Test for moisture across the slab, with particular attention near repaired cracks, since crack repair materials can trap moisture if not fully cured.
- Clean thoroughly to remove all dust and residue from the grinding and repair process before coating application begins.
When to Call a Professional Instead of DIY
Minor hairline cracks in a garage floor can sometimes be handled with an off-the-shelf crack filler kit before a DIY epoxy kit application. But several situations call for a professional, not a weekend project:
- Cracks wider than about 1/8 inch or showing any vertical offset between the two sides
- Multiple cracks radiating from one point, which often indicates a structural issue
- Any crack near a load-bearing wall or column
- Signs of active movement — cracks that have visibly widened over recent months
- Any large-scale coating project where failure would mean redoing an expensive commercial or garage installation
A professional contractor doesn’t just fill the visible crack — they diagnose why it happened, confirm the slab has stabilized, and choose a repair method that will actually hold up under the coating for years, not months.
FAQ
Can epoxy be applied directly over a crack without repairing it first?
No. Even hairline cracks left unrepaired will typically reappear through the coating (reflective cracking) within a relatively short time, undermining the investment in the new floor.
How long do crack repairs need to cure before coating?
This depends on the repair material, but most epoxy and polyurethane crack fillers need at least 24-72 hours of cure time before surface grinding and coating prep can begin. Always follow the specific product’s cure schedule.
Will crack repair make the floor look uneven under the coating?
A properly executed repair, ground flush with the surrounding slab before coating, should be virtually invisible once the epoxy is applied, especially with pigmented or textured topcoats.
What causes a crack to come back after repair?
Usually one of two things: the repair material wasn’t matched to the crack’s movement characteristics (rigid filler in an actively moving crack), or the underlying cause of the crack (settling, moisture, structural issue) was never resolved.
Is it worth repairing cracks if I’m planning to replace the whole slab eventually?
If replacement is genuinely imminent, a temporary, lower-cost repair may make sense. If the coating is meant to last, invest in the repair method matched to the crack type, since a proper coating job should last a decade or more.
Get Your Floor Repaired Right, Not Just Patched
Rock Star Coating Pros diagnoses cracks before recommending a repair method, so the coating that goes down after actually stays down. Contact us for a floor assessment before your next epoxy installation.